Our newest PowerFlex SRA 1.0.1.67 is available for download now here. This release supports our latest PowerFlex release 4.6. There is only one other major change to the SRA which impacts the upgrade process so I’m going to cover that in its entirety to avoid any confusion.
Upgrade
Previous upgrades to the PowerFlex SRA were simple overwrites of the existing one. There are a number of issues with this process, but I won’t bore you with the details. Let me explain how an upgrade proceeds now, which is also in line with our other storage platforms.
Repository tags
Beginning with Dell PowerFlex SRA version 1.0.1.x, the Repository tags now include the version number. Previously each SRA had the same Repository tags of sra_powerflex:latest. The figure below demonstrates the old tag in red and the new tag in green. As one can see in the image, if the tags are different, SRM views them as two different SRAs.

Since each PowerFlex SRA will have a different Repository tag, all Dell PowerFlex SRA releases after 1.0.1.x will create a new adapter. Once installed, the configuration from the previous SRA is copied to the new SRA. This is done online and does not require re-adding the array pairs. To upgrade the SRA, complete the following steps:
- In the SRM Appliance Management dialog box where the existing PowerFlex SRA is located, select Storage Replication Adapters in the menu on the left and then click NEW ADAPTER.

- Select UPLOAD and navigate to the new SRA file. Select it and click Open. The SRA will upload and provide a status.

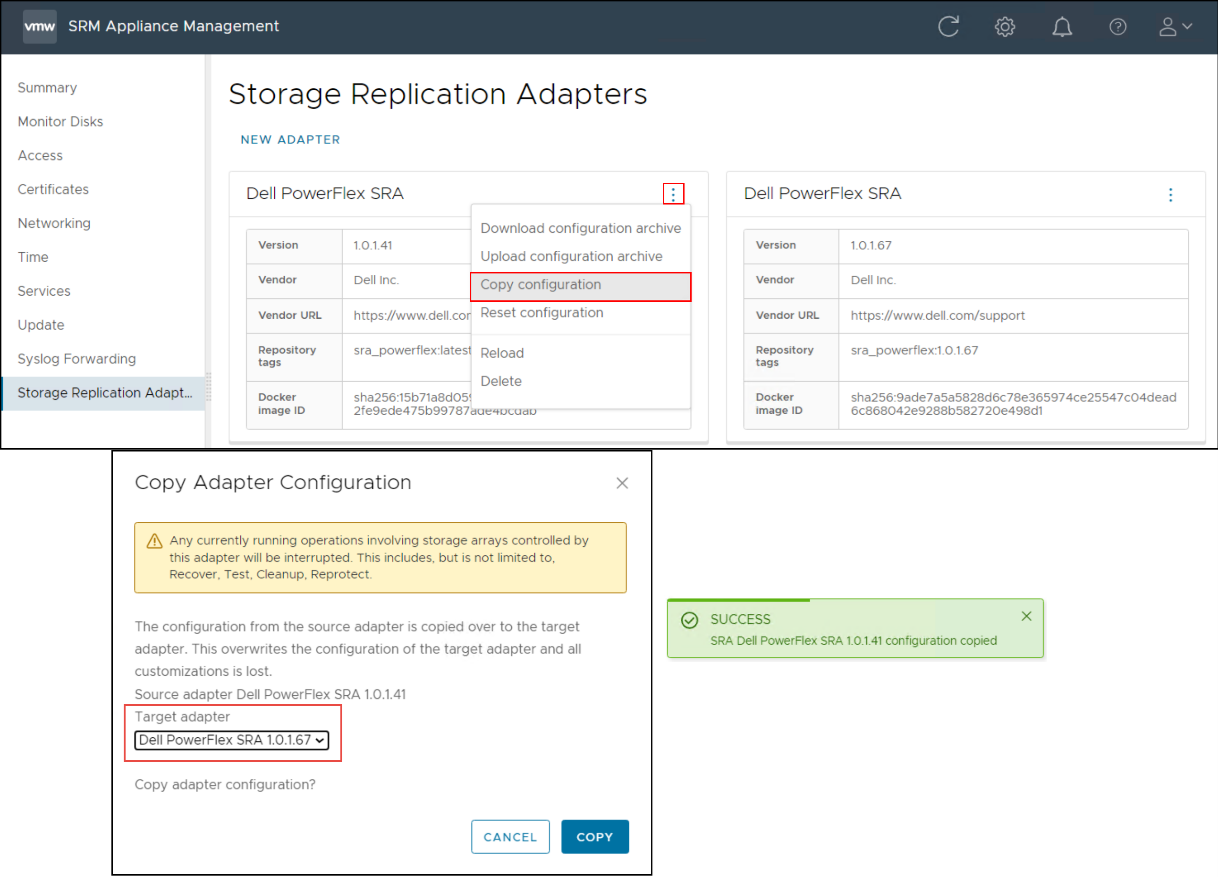
- When the upload completes, copy the configuration from the old SRA to the new one. To do this, click on the 3 buttons in the corner of the old SRA and select Copy Configuration. The Copy Adapter Configuration dialog box will come up. Under the Target adapter drop-down, the new PowerFlex SRA will already be selected if there are only the two SRAs. If there are additional SRAs it may be necessary to use the drop-down to pick the new PowerFlex SRA. Then click COPY and a status screen follows.
- To properly clean-up the old SRA, it needs to be reset and deleted. Start by clicking on the 3 buttons in the corner of the old SRA and select Reset configuration. When the dialog box appears select RESET. A status will be returned.

- Now repeat the process to delete the SRA. Click on the 3 buttons in the corner of the old SRA and select Delete. When the dialog box appears select each check box and then DELETE. A status will be returned.

- Finally, run a RESCAN ADAPTERS in the SRM UI on each site. This can be done from either SRM site as both are available as shown in the green box below.

This completes the upgrade process. No further action is required as all protection groups and recovery plans that were valid before the upgrade will remain valid after.
You can find both the Release Notes and my Implementation guide with the upgrade information here. Note that the new name of VMware Live Site Recovery is used.

Leave a comment